28 Tips on How to Winterize Your Home Before the Cold
- October 1, 2024
- By Cody Battershill
Simple Tips to Help Prepare Your Home for Fall/Winter
Preparing your home for winter is key if you want to stay warm while retaining your property's value over the long term. Follow these simple tips to winterize your home before the cold comes and feel comfortable cozying up during the fall and winter seasons!
So you’ve found your winter attire in the bottom of the closet and have stocked up on your favourite hot drinks and soups. You are ready for below-zero temperatures, but what about your home? Have you taken the steps to winterize your home before the cold?
As a homeowner, you should take precautionary steps to winterize your house not only to prevent damage and add winter comfort but also to maintain your property's value over the long run.
Here are 25 ways you can start winterizing your home for the cold before it’s too late. Also see:
- 3 Things You Need to Endure Calgary's Winter
- 12 Calgary Winter Essentials
- 10 Tips for Successfully Selling Your Home During the Winter
- Best Calgary Winter Festivals
How Winterize Your House: 28 Tips
- Inspect your home for leaks and cracks
- Seal doors and windows
- Add insulation in the attic
- Test and maintain your furnace
- Get a furnace inspection and cleaning
- Consider replacing your old furnace
- Buy furnace filters in advance
- Service your chimney
- Apply window coverings
- Clear your gutters and eavestrough
- Inspect your roof for leaks
- Point drain pipes away from the foundation
- Drain your water pipes
- Turn up the heat a bit
- Wrap water pipes with insulation
- Know where the water shut-off is
- Install a programmable thermostat
- Install a car starter
- Insulate your garage
- Install a garage heater
- Buy de-icer and sand
- Reverse your ceiling fans
- Clean your garage
- Trim your trees
- Buy winter survival gear
- Check your winter equipment
- Put utilities on your contact list
- Stock up on food and water
#1 - Inspect your home for leaks & cracks
The first and foremost step to winterizing your home is to inspect the interior/exterior for any cracks and leaks. You'll find these on:
- window sills
- concrete foundation
- stucco exterior
- broken window latches/locks
- Entranceways
Seal the cracks using the appropriate method.
Caulking is best done ideally in a warm setting, i.e., inside your home, although durable outside-able brands are also available.
#2 - Seal doors and windows
You'd be amazed at how much a small crack in a door or window seal can bring down the energy efficiency of your home during the winter.
For all doors and windows, make sure that upon closing, they create a complete seal around the edges. Run your finger along the edges to feel for any cold-air drafts.
If you find a crack, use weatherstripping or draft stoppers to seal any gaps. This will prevent cold air from entering your home and warm air from escaping, helping to maintain your home's warmth throughout winter.
#3 - Add insulation in the attic
Adding insulation in the attic is an effective way to keep your home warm and energy-efficient. If your home is a bit aged and gets unbearably cold during the winter, doing so may be one of the best ways to winterize your property.
If you are adding more insulation to an existing layer, avoid using a type that would act as a vapour barrier. This could cause moisture to build up and result in mould growth. Also, make sure that the attic is properly vented to prevent such a scenario.
Are you unsure which insulation is best to use? Ask your local home department store specialist for advice. For the best results, make sure to let them know what kind of insulation is currently being used.
#4 - Test and maintain your furnace
Put your furnace through its paces before the cold comes.
Once turned on, your furnace will have a strange, short-lasting smell; simply aerate the area to remove the smell.
If the odour persists, turn it off and call a furnace professional to book an appointment. There may be something wrong with your furnace, and it should be fixed as soon as possible.
There is no substitute for checking and maintaining your furnace, which heats your home. A well-operating furnace is perhaps one of the most essential parts of preparing your home for winter.
#5 - Get a furnace inspection and cleaning
Having your furnace inspected and cleaned annually is never a bad idea. Doing so ensures that your furnace will be in tip-top shape for many winters to come.
Your standard furnace inspection/tune-up fee usually starts around $150 to $200 or more in this day and age. The company will block off your vents around the house as they pump air through the furnace, sucking up and dust and grime collected inside the HVAC system.
A furnace inspection/cleaning is a good investment if you want to ensure that your furnace is performing optimally in fall and winter.
#6 - Consider replacing your old furnace
If your furnace is outdated, buying a new one may be ideal and save you money over the long haul.
A new and improved furnace also means your home will likely be warmer inside during winter.
Old furnaces can use up to 50 per cent more energy than new ones and don't warm your house as effectively.
In short, a healthy furnace is critical to winterizing your home before the cold and saving a few bucks while you're at it!
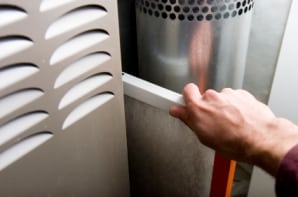
#7 - Buy furnace filters in advance
It's convenient to stock up on furnace filters before the cold; replace your filter when it starts to get chilly outside to ensure a healthy furnace throughout the winter.
A dirty filter will impede the efficiency of your furnace by restricting airflow.
Also, ensure that the furnace is fully intact; sometimes, sliding them into that small space can cause them to tear and break apart. You'll want to avoid this to make sure no extra materials get sucked into the furnace or accidentally damage its internal parts.
Different filters must be changed at various intervals, usually every two to four months. Many people switch it out every six months.
This is just a friendly reminder that if you choose to do so in six-month intervals, you'll probably have more dust on the shelves than if you were to do so every two or three months.
#8 - Service your chimney
If you have a chimney, servicing it will help you winterize your house. Not only will doing so help remove any build-up of creosote (a flammable by-product of burning wood), but it will also improve the flow of air and allow the chimney to operate more effectively.
Servicing your chimney typically also includes a visual inspection by the contractor. This will identify any cracks or structural deterioration that could be allowing for cold air to come into your home.
By servicing your chimney, you will ensure that the fireplace is in working order and remains a reliable heat source during the winter months.
#9 - Apply window coverings
Adding window layers can help prevent heat loss, not only helping to winterize your home but also trimming your heating bill.
Consider covering your windows with plastic insulation or more designer-savvy kits if aesthetic appeal is important to you. Insulator kits are found at home department stores such as the Home Depot and RONA, and are an affordable means to prevent heat from escaping through your windows.
Tap bubble wrap on your windows if you want to go an extra step. It works as an excellent insulator during the winter. Your friends and family might think you've lost your marbles, but at least you'll save even more money on the heating bill — so who cares?
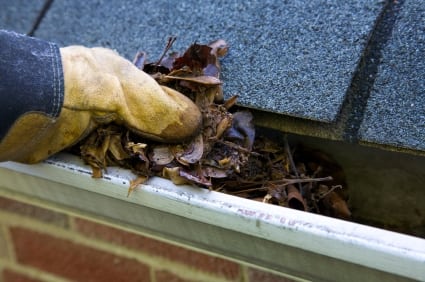
#10 - Clear your gutters and eavestrough
Get on the roof carefully with your tool of choice (a spatula, broom or your hand with a set of gloves works great), or, use a ladder and remove clutter from your eaves trough.
If possible, grab the hose and spray out any remaining residue, assuming that the weather outside isn't cold enough to cause icing problems along your walkways.
Cleaning your eaves trough will prevent ice blockages, which may cause snow and water runoff to drain toward the foundation of your house. Pools of water in such areas can freeze and cause foundational problems that are super expensive to fix.
#11 - Inspect your roof for leaks
A full inspection of your roof—as long as it's safe—should be part of the steps you take to winterize your house.
Inspecting the roof is essential because any leaks into the structure of your home can cause water to accumulate and freeze in the foundation, window sills and attic. Once this water seeps into those nooks and crannies, it has the potential to freeze and expand, causing immense damage to your home.
If your roof is slippery for any reason, you may want to call a professional to inspect it for you. Or, wait until you can do it yourself without any safety hazards.
#12 - Point drain pipes away from the foundation
Ensure your gutter spouts drain properly without blockage and carry water away from your home's foundation.
As mentioned above, water collecting near your home's foundation threatens its structural integrity. Water expands when it freezes; therefore, if it seeps into the concrete cribbing of your home through a crack and solidifies, it may make that crack even bigger.
Foundational issues are some of the most expensive problems for homeowners to fix. To avoid such issues caused by freezing water, winterize your house by following this step.
#13 - Drain your water pipes
Drain any air conditioners you might have before the cold weather comes. If your air conditioner has a water shut-off valve, close it.
Also, drain all pipes leading to outdoor water faucets and any garden hoses you might have.
Irrigation systems must be blown with clean air so water doesn't accumulate, freeze, and crack your pipes in sub-zero temperatures. Cracked irrigation systems and piping are expensive to fix. Outdoor pumps for ponds or other features of the sort must also be cleared of water and put inside in a warm place.
Winterizing your home appropriately will help avoid having to make any piping-related repairs.
#14 - Turn up the heat a bit
If you plan on leaving your home for an extended period, turn the heat up. It might be -15 Celsius one day, but drop to -30 Celsius the next; that added heat will help prevent pipes from bursting while you're gone.
Even if you're not going away, a little more heat will help you stay cozy and warm at home, assuming there are no serious issues with your furnace or leaks to the outside.
Being away from home for an extended period without someone regularly checking your place can also sometimes void your insurance in the case of frozen pipes or other winter-weather-related issues.
Check with your insurance company about your exact policy when travelling. This is important because not all insurance policies cover damage that may have been caused indirectly that could have otherwise been prevented. Knowing what is and is not covered by your policy is critical.
#15 - Wrap water pipes with insulation
Your home should have several pipes that run close to the outside walls, especially in the basement.
Insulate the pipes using a made-for sleeve which you can get from your local department store.
It's an inexpensive way to winterize your house before any expensive accidents happen that could cost you thousands.
Wrapping these pipes in insulation will go a long way in preventing any freezing, potentially costing you big bucks to fix.
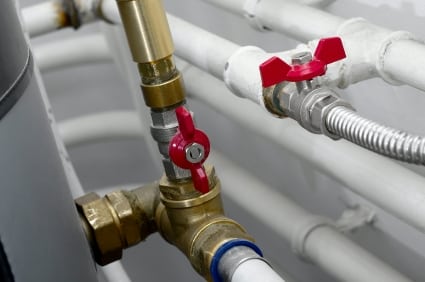
#16 - Know where the water shut-off is
Let's say a pipe does freeze and causes a backup of water flow in your basement. Now your basement is flooding, and you need to know where to turn the water off quickly.
Before the cold arrives, take some time to locate where the main water valve is in your home. In Canada, this valve is usually in the basement near the utility stack. Make sure to label it somehow in case you aren't home and a family member or roommate needs to turn the valve off instead.
Knowing where the main water shut-off valve is could save you a big mess and lots of money. Also known as "preventative maintenance," knowing where the water shut-off valves are is an important step in winterizing your property before the cold.
#17 - Install a programmable thermostat
For every degree you lower your home's temperature during winter, you'll save on your heating bill.
Programmable thermostats sense and adjust your home's temperature accordingly. Installing one will benefit your wallet and the environment.
Smart thermostats are incredibly handy as they can be operated from an app on your phone. Therefore, whether you're coming or going, you'll have complete control of your home's temperature.
Many homeowners turn down the temperature while away at work and then turn up the heat shortly before coming home. Scheduling this sort of regime is easy when using a smart thermostat app and can be automatically set up for convenience.
#18 - Install a car starter
Consider installing a car starter if you don’t have one already, especially if you park outside. Or, if you're parking in a garage, you could always buy a block heater that would keep your car moderately warm come work time.
There's nothing better than warming up your ice-cold car before getting inside every morning. Winterizing your home and car for the cold goes hand in hand.
Car starters can cost anywhere between $500 to $1,000 or more. Because many are third-party hardware, it is a good idea to have the starter installed at your car dealership.
#19 – Insulate your garage
Insulating your garage for the winter is a worthwhile investment, particularly if it's attached to your home.
An uninsulated garage can substantially lower the temperature of adjacent rooms, causing mild discomfort while increasing heating requirements and energy bills.
Spray foam is one of the most common methods of insulating your garage. While more expensive than batt-type insulation, its R rating is typically much higher and will help keep your garage warm, especially if there is a heating mechanism on the inside.
#20 – Install a garage heater
Installing a garage heater can go a long way in helping winterize your house for the colder seasons. Not only will it keep your vehicles warm and ready to use, but it will also help to insulate and maintain the temperature in adjacent rooms.
Garage heaters come in many different shapes and sizes. You’ll have a choice between many makes and models, but the important decision is whether it will run on electricity or natural gas.
These devices can range from a few thousand bucks to several thousand; by no means is this a small purchase, so do your due diligence and research various companies and products before buying one.
#21 - Buy de-icer and sand
Stock up on some sand and ice melt bags to spread on your walkways. This will help prevent any slips or falls when coming in and out of your house and will ensure hazards are reduced.
Some jurisdictions have bylaws that require you to remove snow and ice from your walkways and sidewalks along your property. De-icer helps melt tough ice that is otherwise hard to remove.
Another great trick for winterizing your home and making it more visitor-friendly is to buy a proper ice scraper. Your family and friends will appreciate it!
#22 - Reverse your ceiling fans
Reversing your ceiling fans in a clockwise direction will push warm air downwards and help to circulate air accordingly.
This is an easy method to winterize your home for the cold, which, in some instances, can cut heating costs by up to 10 percent!
If you're unsure how to reverse your ceiling fan, look for the user’s manual or search for guidance online.
#23 - Clean your garage
Consider decluttering your garage so that you can park your car inside with ease.
Allow yourself to walk comfortably without the slip-and-trip hazards that come with wet shoes and slushy, cluttered floors.
A cluttered garage also reduces the effectiveness of any heating systems you have installed, so it’s best to make sure everything is neat and tidy.
#24 - Trim your trees
Part of winterizing your house before the cold includes doing preventative maintenance tasks like cutting any overhanging tree branches that, if covered by heavy snow, could break off and fall onto your house.
Ask a professional landscaping company to help, or if you're a do-it-yourself kind of person, you can do it too. Always make sure to use proper safety gear and methods for any tree trimming as any work at heights can be a dangerous task!
#25 - Buy some survival gear
You never know when an outdoor storm could cause power outages in your community. Buy some lighters, matches, and candles so you can see in the dark in case of a power shortage.
You could also consider purchasing a backup generator as a power source if you think it's necessary.
For example, if you have a fish tank, it might be essential to have another source of electricity available to you. Your fish won't be able to live too long without the pump that helps oxygenate the water they live in.
#26 - Check your winter equipment
Consider creating an emergency "winter" car package with a blanket, batteries, first-aid kit and other necessities in case you get stuck out in the cold.
Replace any worn snow shovels and brooms. As mentioned before, consider getting an ice scraper to remove that nasty ice on the driveway/walkways that we’ve all had a slip and fall on at one point or another.
Don’t skimp on buying the best snow shovel if you can. The ergonomic design and materials used by the more expensive shovels are worth the extra cost and will save your back while making the job easier.
#27 - Put utilities on your contact list
Have the phone numbers of your utility providers handy — perhaps on the front page of the phone book or on the whiteboard beside the phone.
If an emergency arises, it will be helpful to have these numbers and resources readily available, because you just never know!
#28 - Stock up on food and water
Stock up on non-perishable food and water as well as a first-aid kit and blankets. Have an evacuation plan in case of an emergency situation. You just never know if you'll need them or not!
Here's a list of non-perishable food items that are relatively healthy.
More Home Seller Guides:


